Overview
Permissions allow you to have greater flexibility with Printfection and allow your teams to be more collaborative in the swag process.
For example, if you wanted to have 3 team members submit creative ideas for swag, but only allow one decision maker to be able to approve those items for use within your account or to actually make purchases, you could set that up using permissions.
Although we are increasing the granularity of permissions, please keep in mind every permission level does grant some level of access to your Printfection application. Please add users accordingly.
This article will cover what the different types of permissions are, as well as how to change them if you're an Admin.
Permission types and meanings
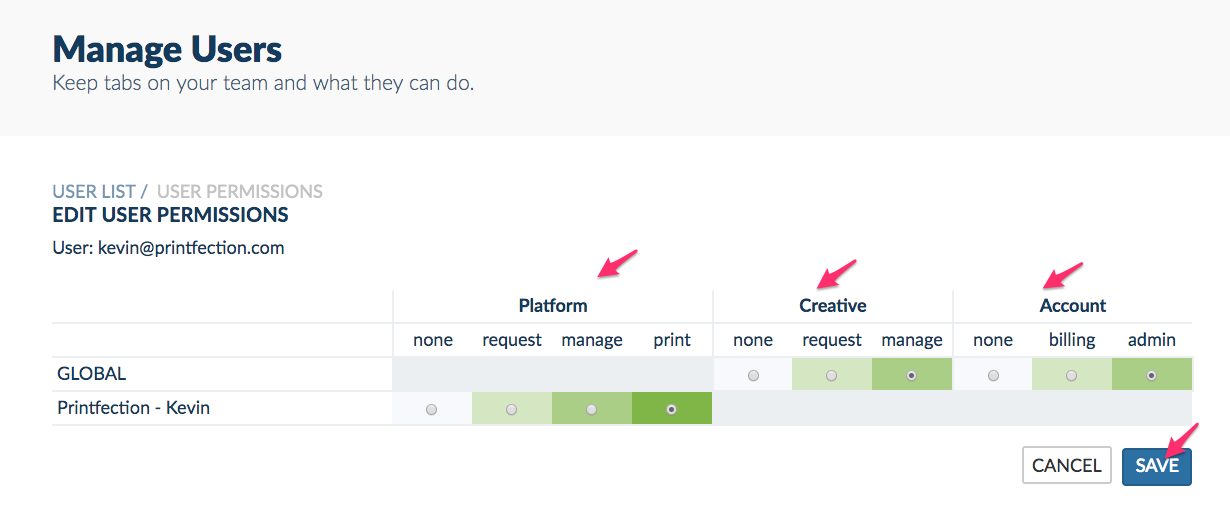
Permissions fall into 3 groups with different permission levels within each group.
As you move from left to right, the roles increase the user's capabilities within the app.

If a user has Platform Manage permission or higher, Creative, or Account permission they will be allowed to log into the Printfection application.
A user can have varying permissions across the 3 different groups.
Note: Every customer is required to have at least one Account Admin user, one Creative Manage user and one Platform Print user.
1) Platform: Permissions that cover operational usage within Printfection.
- Request
- Users can submit orders for approval on Collection campaign external pages and view order receipts
- Manage - Can do everything a Request user can do, and can also:
- Add/manage campaigns
- Can place and approve orders to ship from fulfillment
- Can view reports for all campaigns/orders
- Can add/manage payment methods
- Print - Can do everything a Manage user can do, and can also:
- Print merchandise to either ship into inventory or drop ship to your final location
- If on Standard or Enterprise plans, can ship merchandise into the Printfection fulfillment center
- Can update whitelisted domains
2) Creative: These permissions are all related to the swag itself, from the design and setup of items and kits.
- Request
- Can submit/view item research requests, item setups and kit setups
- Manage - Can do everything a Creative Request user can and also:
- Approve items and kits
- Archive/unarchive items and kits
3) Account: Primarily used for updating the permissions of other users as well as handling billing.
- Billing
- Can view subscription receipts
- Can search all orders and view order receipts
- Can view reports
- Can add/manage payment methods
- Admin
- Will get subscription charge emails
- Can add/remove all users and update user permissions
- Can update whitelisted domains
Note: Subscription charge emails will only go to the Account Admin. If you don't want to receive these subscription emails, you will want to downgrade from the Admin level permission.
How these new permissions impact your existing users
Previous Full and Light users won't notice any difference in their day-to-day usage of Printfection.
Users who were previously Full users will have the max level of permissions in each group (see below).

Light users will only get the Platform Request permission.
When you add new users, you will be able to set their various permissions, provided you are an Account Admin.
How to change user permissions
If you are an Account Admin, go to the Accounts tab at the upper right once you are logged into Printfection.
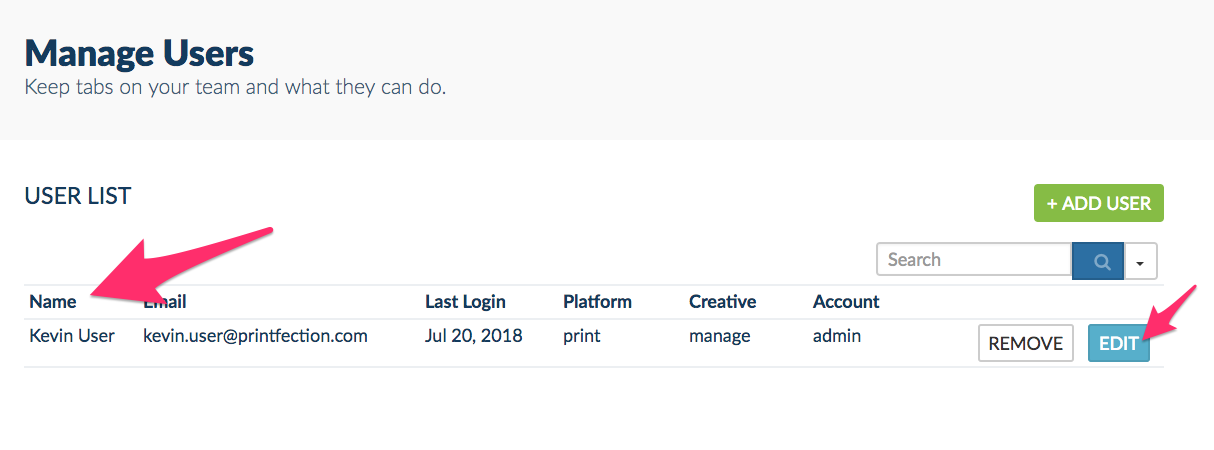
Click Manage Users in the sub-navigation heading.

As an Account Admin, you can add users or change permissions of any user, and grant any level of Platform, Creative or Account permissions.
Find the user you wish to edit, and click the blue Edit button.

Next, simply select the level of permissions within each group and hit save.

How to add users
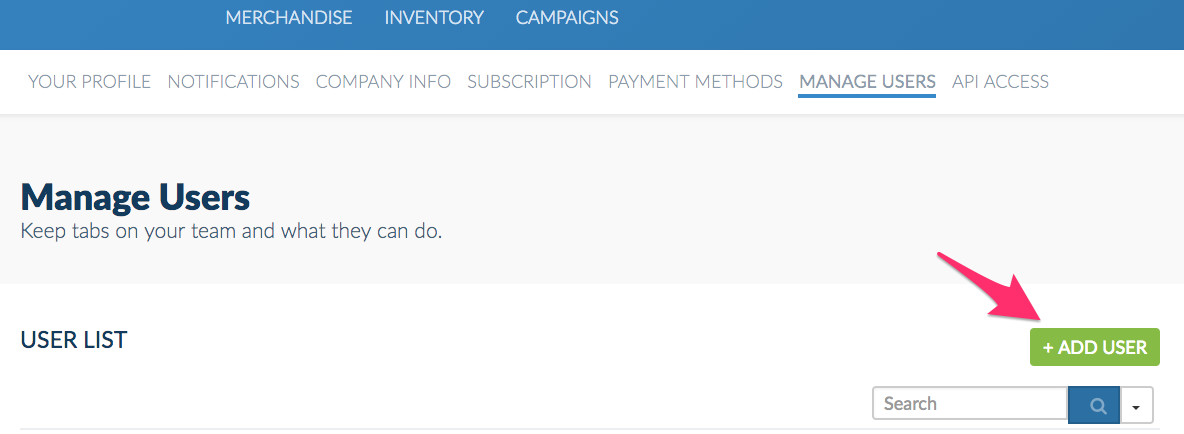
If you have the right permissions to add a user, log into Printfection, then go to Account at the upper right, and then Manage Users in the sub-nav.
Then click on the green Add User button.

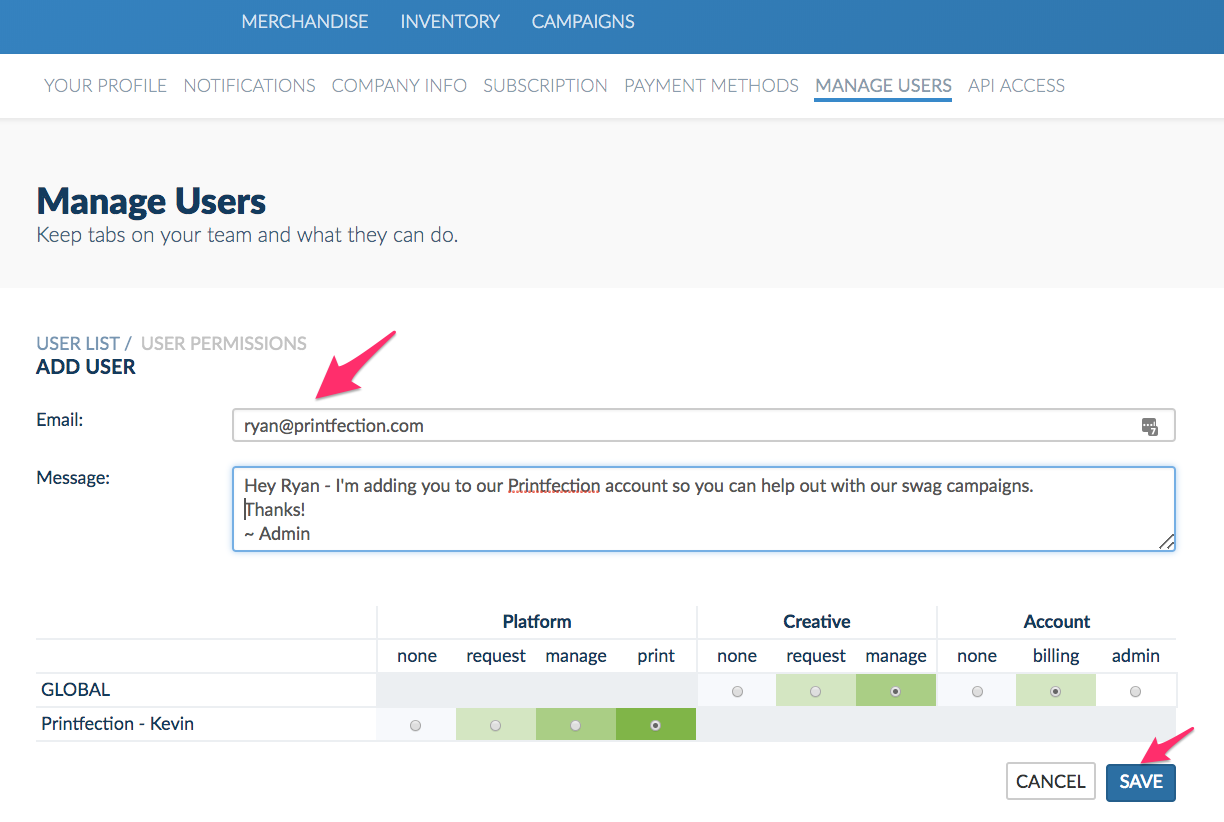
Enter the new user's email address, customize your invite message, and then select the roles within the 3 permission groups.
When ready, just hit the 'Send Invitation' button, and your new user will receive an email to join your account.
